
Figure 5-1: A GIF image with text and solid blocks of color.
Dreamweaver MX 2004 offers new image-editing features, but you need to create your original images in a graphics software program, such as Photoshop, Fireworks, or Paint Shop Pro, or use free clip art images -- just search for free clip art in your favorite search engine.
Before you find out about the mechanics of inserting a graphic into a Web page, let's review the types of graphics that Web browsers can handle and when to use a particular graphics format in your Web page.
Bitmap graphics are the most commonly used graphic format on the Web, and include three file formats: GIF (Graphic Interchange Format), JPEG (Joint Photographic Experts Group), and PNG (Portable Network Graphics). Bitmaps store information in pixels, short for picture element -- a single point in a graphic image. The larger the bitmap image, the larger the file size.
GIF Files
GIF files are bitmap graphics that use indexed color and lossless compression. This means that if there are shades of different blues or different reds, saving a file to a GIF format generalizes the colors so that there aren't so many different shades or variations. This process cuts down on the amount of descriptive information contained in the file, which in turn considerably reduces the file size. Lossless compression means that the compression system doesn't lose any of the information, so image quality remains the same, even if the image file is opened and saved multiple times.
GIFs use 8 bit (2^8) color depth. This means that GIFs can use, at most, 256 colors. However, this doesn't mean that each GIF is limited to the same 256 colors -- the palette of 256 colors for any individual GIF can be selected from a color space of millions of colors. A GIF doesn't have to include 256 colors -- limiting the number of colors to a smaller number helps decrease the overall file size.
Color depth is the number of bits used to represent color and determines how many colors can be seen on the screen at any one time.
One major advantage of GIFs is support for transparency. You can specify one or more of the colors in a GIF to display with transparency, which means that it will be clear and show whatever background it's placed on. This allows GIFs to blend into the background color of a Web page.
GIFs can be saved in interlaced format, so they display gradually as they download to a Web page, rather than all at once.
The general rule used by Web designers and graphic designers alike is to only use the GIF format if you do not have gradients (where colors fade into one another or where there are many tones, such as skin, grass, sky, and so on). For the most part, if you stay away from GIF files when you're posting photos, you'll be just fine. Figure 5-1 shows a GIF image.
Figure 5-1: A GIF image with text and solid blocks of color.
JPEG Files
JPEG files are bitmap graphics that use TrueColor (24-bit) and lossy compression. A JPEG can contain any number of colors. JPEG's lossy compression scheme means that you must make a choice between image quality and image size. When you compress a JPEG image, you lose some of the information in the original image. Because monitor resolution is low (72 to 96 pixels per inch) you can usually do substantial compression of a JPEG without any loss in the quality of the display on a computer monitor.
24-bit color depth means that JPEGs can display up to 2^24, or 16,777,216 colors. They do not, however, support transparency.
JPEGs work well for images with gradual transitions between different colors and different shades of color. JPEG files are predominantly used for photographs. JPEG files have many levels of quality (1 to 100), so you'll want to play with the different levels, making the quality level as low as possible to reduce file size. The best way to do this is to save at a general level, such as 40, drag and drop your image onto a Web browser, and see how it looks. If it looks good, leave it. If it looks jagged or pixelated, up the quality level until your image looks presentable.
JPEG images do not scale well. When you zoom into a JPEG image and increase its size, it becomes pixelated; in other words, it becomes possible to distinguish individual pixels.
PNG Files
PNG files are bitmap graphics that use lossless compression and a variety of color choices, including TrueColor (24-bit), true grayscale, and index (8-bit) color. PNGs were originally developed as a replacement for the GIF format and have several advantages when compared to GIFs -- the PNG compression scheme produces more compression, multiple color depths are available, the interlacing is more sophisticated, and the transparency (alpha channel) is much more sophisticated.
The major block to more widespread use of the PNG format is a browser issue
-- the lack of support for alpha transparency in Microsoft Internet Explorer
for Windows. Unlike GIF transparency, alpha transparency enables you to use
one image over any background, whether that background has a single solid color
or not. Netscape 7, Opera 5+, and Microsoft Internet Explorer 5 for Macintosh
all support alpha channel transparency, and display PNGs correctly. Although
a new version of Internet Explorer will not be available until the next version
of the Microsoft Windows operating system is developed, Web developers and Web
designers are hoping that one of the new features will be alpha transparency
support.
Click the spot on the page where you want to add an image.
Choose Insert > Image from the main Dreamweaver application window.
The Select Image Source dialog box opens, as shown in Figure 5-4. Browse to
the location of your image and click OK.
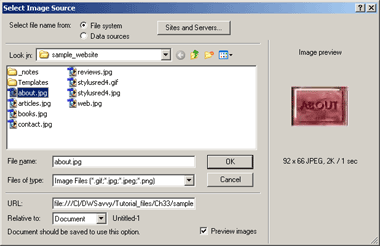
Figure 5-2: The Select Image Source dialog box.
View a larger version of this image.
You can also add images by clicking the Images icon in the Common Insert bar
and selecting Image from the drop-down menu.
Image Properties Page 3 of 5
You can use the Properties inspector, shown in Figure 5-3, to set additional
image properties, such as the following:
![]()
Figure 5-3: The Image Properties inspector.
View a larger version of this image.
W(idth): Sets the width of the image.
H(eight): Sets the height of the image.
Src: Specifies the location of the image file.
Link: Allows you to add a URL to make the image a hyperlink.
Alt: Adds alternative text for viewers using speech-enabled browsers or those
viewers who browse with image turned off.
Edit: Is a group of image-editing features, new to Dreamweaver MX 2004. You
can click these icons to:
Edit the image in the graphics software program of your choice. Select a program
in the File Types/Editors category of the Preferences window (Edit > Preferences).
Optimize the image in Fireworks. This requires that you have Fireworks installed
on your computer. You can also optimize images in other graphics software programs.
Crop the image to reduce the area of the image and save only part of the image.
Resample the image by adding or subtracting pixels to an image after you've
resized it. You can resize an image by selecting it and then dragging the resize
handles to make the image whatever size you choose.
Modify the brightness and contrast of the image.
Change the focus of the image by sharpening it.
Class: Lets you add or apply a style to the image.
Download the following images and save them to your hard drive: purple.gif and yellow.gif. To create a rollover using these files, follow these steps:
Create a new HTML page in Dreamweaver (File > New).
Click the spot on the page where you want to add a rollover image.
Select Insert > Image Objects > Rollover Image. The Insert Rollover Image
dialog box, shown in Figure 5-4, appears.
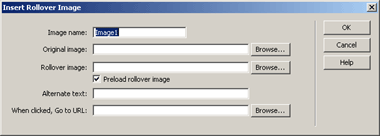
Figure 5-4: The Insert Rollover Image dialog box.
View a larger version of this image.
Change the name of the Rollover image if you'd like. The default is Image1.
Browse to the location of the Original image (purple.gif). This is the image
that displays when the mouse is not over the image.
Browse to the location of the rollover image (yellow.gif). This is the image
that displays when the mouse is over the image.
Add alternate text in the text box.
Add a URL if you want the image to function as a link.
Click OK.
Save the page as rollover.html.
Preview the page in the browser of your choice (File > Preview in Browser)
to see the rollover in action.
Audio
Web audio files are available in several different audio formats, including:
MIDI (Musical Interface Digital Interface)
WAV (Waveform Extension)
AIFF (Audio Interchange File Format)
AU (Basic Audio)
MP3 (MPEG Audio Layer 3)
RA or RAM (RealAudio)
You can embed an audio file in your page or link to an audio file.
When you embed an audio file, a sound player is inserted on your page. The user still needs the appropriate plug-in to play the sound file. To embed an audio file, follow these steps:
From the Common Insert bar, click the Media icon, and then choose Plugin (or
choose Insert > Media > Plugin).
In the Select File dialog box, shown in Figure 5-5, either enter the URL of
the audio file or browse to the location of the audio file you want to insert.
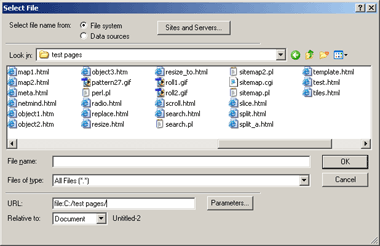
Figure 5-5: The Select File dialog box.
View a larger version of this image.
Open the Properties inspector (Window > Properties) and enter a width and
a height value for the sound player display.
When you provide a link to an audio file, you give the user the most choice
about whether to listen to the file, and by having such a link, you can get
around the issue of browser support for embedding sound files.
To link to an audio file, follow these steps:
Select a block of text or a graphic from your page to use as the link to an
audio file.
Open the Properties inspector (Window > Properties).
Click the folder next to Link to browse to the audio file to which you want
to link, or enter the URL in the Link text box.
TIP
FindSounds.com is a search engine for finding sound effects and sample sounds
on the Web.
Video
Web video files are available in several different formats, including:
AVI (Audio Video Interleave)
MPEG (Moving Picture Experts Group)
Streaming video formats, such as QuickTime, RealMedia, and Windows Media
Newer versions of Internet Explorer support streaming video, MPEG video, and
QuickTime movie playback in the basic installation. Netscape Navigator, however,
has more limited support for video playback and video streaming, and even the
latest version (Netscape Navigator 7.1) requires a plug-in to play QuickTime
movies. Netscape 7.1 is, however, the first version of Netscape to support the
Windows Media Player.
To add a video file to your page, follow these steps:
From the Common Insert bar, click the Media icon (or choose Insert > Media).
Choose the type of media you want to insert (Flash, Shockwave, Applet, and so
on). Or click the Plugin icon to add other video file types.
Browse to the video file from the Select File dialog box (Figure 5-5).
Moving on
In this lesson, you learned how to add images and multimedia files to your
pages. You also learned how to use Dreamweaver's built-in JavaScript behaviors
to create rollovers. In Lesson 6, you'll learn how to use Dreamweaver's site
management features and how to publish your site.